✅ keyframes
1️⃣ keyframes 사용하기
keyframes는 styled-components 안에 이미 들어있다. 웹에서 애니메이션을 구현할 때는 transition과 animation이라는 스타일 속성을 많이 사용한다.
🔹 transition : 단순한 엘리먼트 상태변화에 쓰기 좋다.
🔹 animation : 다이나믹한 효과를 주는데 쓰기 좋다.
keyframes는 animation에서 사용하는 속성 중 하나이다.
👌 네모 박스를 동그라미로 바꾸고 위 아래로 움직이는 것 만들어 보기
▶️ 새 프로젝트에 styled-components 설치해주어야 한다.
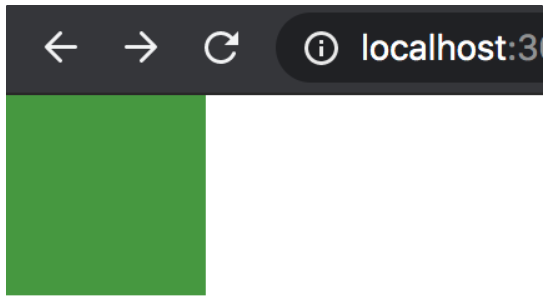
▶️ 네모박스 만들기
| import React from 'react'; import './App.css'; // styled와 keyframes를 불러옵니다! import styled, {keyframes} from "styled-components"; function App() { return ( <div className="App"> <Box></Box> </div> ); } // 박스를 먼저 하나 만들어줍니다 const Box = styled.div` width: 100px; height: 100px; background: green; `; export default App; |
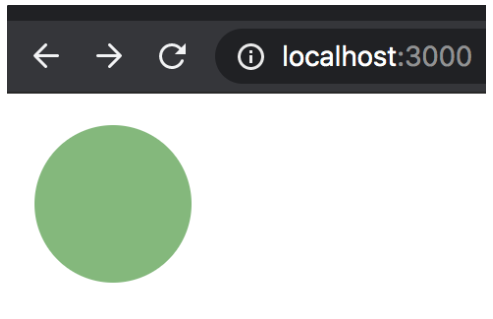
▶️ Box를 동그랗게 만들기
| ... const Box = styled.div` width: 100px; height: 100px; border-radius: 50px; // 동그라미로 바꾼것 background: green; `; ... |
▶️ position을 준다.
| ... const Box = styled.div` width: 100px; height: 100px; border-radius: 50px; background: green; position: absolute; top: 20px; left: 20px; `; ... |
🔹 position : absolute 란?
position 속성이 absolute로 설정되어 있는 엘리먼트는 웹페이지 상에 배치될 때
- 부모 엘리먼트 내부에 속박되지 않고 독립된 배치 문맥(positioning context)을 가지게 된다.
- 따라서, 엘리먼트를 기본적으로 브라우저 화면(viewport)상에서 어디든지 원하는 위치에 자유롭게 배치시킬 수 있으며, 심지어 부모 엘리먼트 위에 겹쳐서 배치할 수도 있다.
(참고 : https://www.daleseo.com/css-position-absolute/)
▶️ 위 아래로 움직이게 해보기
|
const boxAnimation = keyframes`
0% {
border-radius: 0px;
top: 20px;
}
30%{
top: 300px
}
50% {
border-radius: 50px;
top: 700px;
}
100%{
border-radius: 0px;
top: 20px;
}
`
|
▶️ 네모에 애니메이션 효과 넣기
| ... const Box = styled.div` width: 100px; height: 100px; border-radius: 50px; background: green; position: absolute; top: 20px; left: 20px; animation: ${boxAnimation} 2s 1s infinite linear alternate; `; ... |
- const boxAnimaion을 const Box위에 배치해두어야, 먼저 적용되어서 요류가 발생되지 않는다.
- infinite : 무한정 반복
- linear : 부드럽게
✅ 버킷리스트에 프로그래스바 달기
1️⃣ 순서
1. 뷰를 먼저 만들기(버튼 먼저)
2. 액션 타입 먼저 만들기
3. 액션 생성 함수 만들기
4. 리듀서 만들기
5. 버튼 누르면 액션 호출되도록 하기
👌 styled-components에서 변수 받아오는 법
| const ItemStyle = styled.div` padding: 16px; margin: 8px; background-color: ${props => props.color}; `; |
👌 Progress 컴포넌트 만들기
import React from "react";
import styled from "styled-components";
import { Route, Switch } from "react-router-dom";
import {useDispatch} from "react-redux";
import {createBucket} from "./redux/modules/bucket";

// BucketList 컴포넌트를 import 해온다.
// import [컴포넌트 명] from [컴포넌트가 있는 파일경로];
import BucketList from "./BucketList";
import Detail from "./Detail";
import NotFound from "./NotFound";
import Progress from "./Progress";

function App() {
  const [list, setList] = React.useState([
    "영화관 가기",
    "매일 책읽기",
    "수영 배우기",
  ]);
  const text = React.useRef(null);
  const dispatch = useDispatch();

  const addBucketList = () => {
    // 스프레드 문법!
    // 원본 배열 list에 새로운 요소를 추가
    // setList([...list, text.current.value]);

    dispatch(createBucket(text.current.value));
  };
  return (
    <div className="App">
      <Container>
        <Title>내 버킷리스트</Title>
        <Progress/>
        <Line />
        {/* 컴포넌트를 넣어준다. */}
        {/* <컴포넌트 명 [props 명]={넘겨줄 것(리스트, 문자열, 숫자, ...)}/> */}
        <Switch>
          <Route path="/" exact>
            <BucketList list={list} />
          </Route>
          <Route path="/detail/:index">
            <Detail />
          </Route>
          <Route>
            <NotFound />
          </Route>
        </Switch>
      </Container>
      {/* 인풋박스와 추가하기 버튼을 넣어줬다 */}
      <Input>
        <input type="text" ref={text} />
        <button onClick={addBucketList}>추가하기</button>
      </Input>
    </div>
  );
}

const Input = styled.div`
  max-width: 350px;
  min-height: 10vh;
  background-color: #fff;
  padding: 16px;
  margin: 20px auto;
  border-radius: 5px;
  border: 1px solid #ddd;
`;

const Container = styled.div`
  max-width: 350px;
  min-height: 60vh;
  background-color: #fff;
  padding: 16px;
  margin: 20px auto;
  border-radius: 5px;
  border: 1px solid #ddd;
`;

const Title = styled.h1`
  color: slateblue;
  text-align: center;
`;

const Line = styled.hr`
  margin: 16px 0px;
  border: 1px dotted #ddd;
`;

export default App;| import React from "react"; import styled from "styled-components"; import { useSelector } from "react-redux"; const Progress = (props) => { const bucket_list = useSelector((state) => state.bucket.list); console.log(bucket_list); let count = 0; bucket_list.map((b, idx) => { if (b.completed) { count++; } }); console.log(count); return ( <ProgressBar> <HighLight width={(count / bucket_list.length) * 100 + "%"} /> // 퍼센트 구하는 법 </ProgressBar> ); }; const ProgressBar = styled.div` background: #eee; width: 100%; height: 40px; `; const HighLight = styled.div` background: orange; transition: 1s; width: ${(props) => props.width}; // 퍼센트 만큼만 주황색으로 바꾸기 height: 40px; `; export default Progress; |
✅ 스크롤바 움직이기
| ... <button onClick={() => { window.scrollTo(0,0); }}>위로가기</button> ... |
이렇게 만들어주면, 스르륵 올라가는 것이 아니라 휙 올라간다.
| ... button onClick={() => { window.scrollTo({ top: 0, left: 0, behavior: "smooth" }); }}>위로가기</button> .. |
{} 중괄호 안에 behavior과 top left 지정해주면 스무스하게 올라가고
좌표를 이용해서 이리 저리 움직일 수 있고 ref를 통해 특정 엘리먼트 위치를 받아다가 스크롤 시킬 수도 있다.
✅ Firebase란?
1️⃣ 웹의 동작방식
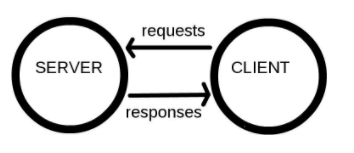
웹은 요청과 응답으로 굴러간다. 클라이언트가 서버에게 요청하고 서버는 클라이언트에게 응답한다.
2️⃣ 서버가 하는 일
데이터 관리, 분산 처리, 웹 어플리케이션 돌리기, 등등 서버가 하는 일이 많다는 것은 서버가 하는일을 전부 관리해줘야 한다는 이야기이다.
3️⃣ 서버리스란?
서버리스는 서버가 없다는 뜻이 아니라, 서버를 신경쓸 필요가 없다는 뜻이다.
이미 누군가가 구축해둔 서버의 일부분을 빌려서 쓸 수 있어, 인프라를 구축하고 서버 스펙을 고민할 필요가 없다. 필요한 서버를 필요한 만큼만 빌려 쓰면 된다.
4️⃣ BaaS는 뭘 빌려오는 걸까?
🔹 BaaS : Backend as a Service의 약자
흔히 백엔드 하면 떠올리는 것을 빌려오는 것이다. 파이어베이스를 예로 들면 데이터 베이스, 소셜 서비스 연동(일종의 소셜 로그인), 파일 시스템 등을 API 형태로 제공해준다.
🔹 파이어베이스 : https://firebase.google.com/products-build?hl=ko
- Firestore는 클라우드 데이터베이스를 제공하는 서비스이다.
- 데이터가 추가되고 삭제하고 가져다 쓸 수 있다.
- 리액트와는 firebase라는 패키지를 통해 편리하게 연결할 수 있다.
- spark 요금제는 무료이다.
✅ Firebase 설정하기
1️⃣ 오른쪽 위 콘솔로 이동 누른 후 프로젝트 만들기 버튼 클릭
2️⃣ 프로젝트 이름 정하고 약관 동의 후 계속
3️⃣ 프로젝트 애널리틱스 설정
✅ FireStore 설정하기
1️⃣ 파이어스토어란?
Firebase에 포함되어 있는 서비스 중 하나로 유연하고 확장 가능한 NoSQL 클라우드 데이터베이스이다.
👌 구조
- Collection : 문서(다큐먼트)의 집합
- Document : JSON 형식으로 데이터를 저장할 수 있다.
2️⃣ 파이어스토어 설정하기
1. 생성된 프로젝트 클릭
2. Cloud Firestore 추가
3. 데이터베이스 만들기 클릭
4. 보안규칙 설정
5. Cloud Firestore 위치 설정
3️⃣ 대시보드에서 파이어스토어 데이터 넣기
1. 콘솔에서 내 프로젝트 -> firestore 선택하여 대시보드로 진입
2. 대시보드에서 컬렉션 시작 버튼 클릭
3. 컬렉션을 만든다.
4. 문서 ID를 저장하고 필드 값을 넣는다.
✅ 리액트에 Firebase 연동하기
👌 파이어베이스 패키지 설치
| yarn add firebase |
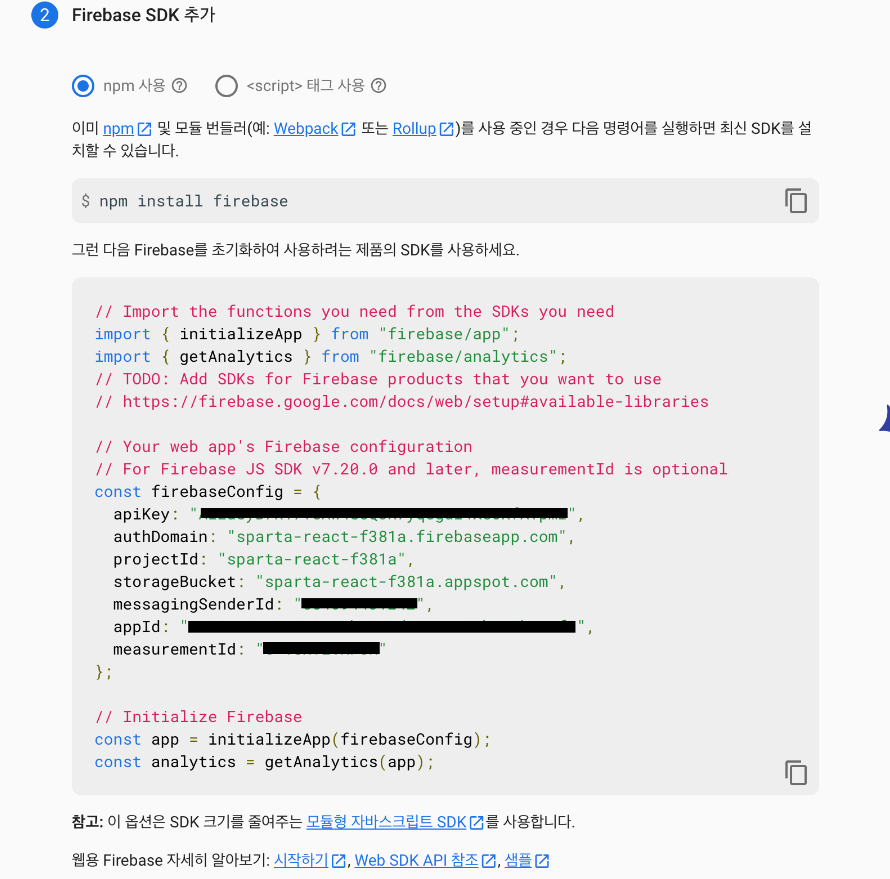
👌 config 가져오기
Firebase 홈페이지에 사용하는 방법 따라하면 된다. 외울 필요 없다.
▶️ src 폴더 하위에 firebase.js 파일 만들기
| //firebase.js import { initializeApp } from "firebase/app"; import { getFirestore } from "firebase/firestore"; const firebaseConfig = { // firebase 설정과 관련된 개인 정보 }; // firebaseConfig 정보로 firebase 시작 const app = initializeApp(firebaseConfig); // firebase의 firestore 인스턴스를 변수에 저장 const db = getFirestore(app); // 필요한 곳에서 사용할 수 있도록 내보내기 export { db }; |
▶️ firebase 대시보드에서 웹버튼 </> 클릭
▶️ 앱 이름을 적고 앱 등록 누르기(Firebase 호스팅 설정은 나중에 해도 된다)
▶️ firebaseConfig 내용만 firebse.js에 붙여넣기
버킷리스트 하위 firebase.js 파일로 만들어서 추가해두었고 App.js에 {db} import 추가 및 console.log(db) 추가되었다. 상세 내용은 나중에 버킷리스트에서 찾아보기!
✅ FireStore 데이터 가지고 놀기
1️⃣ 데이터 전체 읽어오기
* App.js
| import { db } from "./firebase"; import { collection, getDocs } from "firebase/firestore"; ... React.useEffect(() => { async function fetchData() { const bucket = await getDocs(collection(db, "bucket")); bucket.forEach((doc) => { console.log(doc.id, doc.data()); }); } fetchData(); return () => {}; }, []); |
collection()으로 찾은 다음, getDocs()로 콜렉션 내의 데이터를 가져온다.
그리고 forEach문으로 내용을 확인할 수 있다. 사실 배열이 아니기 때문에
2️⃣ 데이터 추가하기
| import { db } from "./firebase"; import { collection, addDoc } from "firebase/firestore"; ... React.useEffect(() => { async function fetchData() { const docRef = await addDoc(collection(db, "bucket"), { completed: false, text: "new", }); } fetchData(); return () => {}; }, []); |
collection()을 찾고 addDoc()
3️⃣ 데이터 수정하기
| import { db } from "./firebase"; import { collection, doc, updateDoc } from "firebase/firestore"; ... React.useEffect(() => { async function fetchData() { const docRef = doc(db, "bucket", "bucket_item"); await updateDoc(docRef, { completed: true, }); } fetchData(); return () => {}; }, []); |
collection()을 찾고 도큐먼트 id로 updateDoc()!
4️⃣ 데이터 삭제하기
import { db } from "./firebase"; import { collection, doc, deleteDoc } from "firebase/firestore"; ... React.useEffect(() => { async function fetchData() { const docRef = doc(db, "bucket", "bucket_item"); await deleteDoc(docRef); } fetchData(); return () => {}; }, []); |
collection()을 찾고 도큐먼트 id로 deleteDoc()!
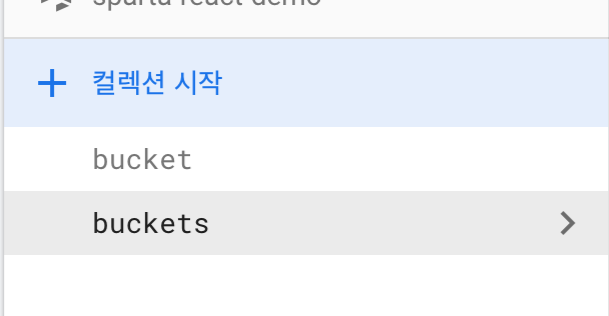
5️⃣ 콜렉션 이름을 바꿔서 추가하면 어떻게 되는지
| // bucket에서 buckets로 이름 바꾸기! 그리고 대시보드를 확인해보기 import { db } from "./firebase"; import { collection, addDoc } from "firebase/firestore"; ... React.useEffect(() => { async function fetchData() { const docRef = await addDoc(collection(db, "buckets"), { completed: false, text: "new", }); } fetchData(); return () => {}; }, []); |
'Front-End, CS 스터디 > 항해99 - React 스터디' 카테고리의 다른 글
| [리액트 React] 숙련 학습 자료 정리 (0) | 2022.07.29 |
|---|---|
| [리액트 React] 입문 학습 자료 정리 (0) | 2022.07.28 |
| [리액트 React] 기초반 강의 3주차 정리 (0) | 2022.07.27 |
| [리액트 React] 3주차 입문 주차 팀 과제 정리 (0) | 2022.07.24 |
| [리액트 React] 기초반 강의 2주차 정리 (0) | 2022.07.24 |


